Setup and Installation
This section is focused on the setup up and installation of the tools necessary to begin developing applications using NXP's framework architecture.
note
This guide will focus on the use of MCUXpresso IDE for development.
MCUXpresso IDE
The MCUXpresso IDE brings developers an easy-to-use Eclipse-based development environment for NXP® MCUs based on Arm® Cortex®-M cores, including its general purpose crossover and Bluetooth™-enabled MCUs. The MCUXpresso IDE offers advanced editing, compiling, and debugging features with the addition of MCU-specific debugging views, code trace and profiling, multicore debugging, and integrated configuration tools. The MCUXpresso IDE debug connections support Freedom, Tower® system, LPCXpresso, i.MX RT-based EVKs, and your custom development boards with industry-leading open-source and commercial debug probes from NXP, P&E Micro®, and SEGGER®.
More information about the MCUXpresso IDE can be found at the NXP website
Install the Toolchain
The MCUXpresso IDE can be downloaded from the NXP website by using the below link:
Once the download has completed, simply follow the instructions in the installer to get started.
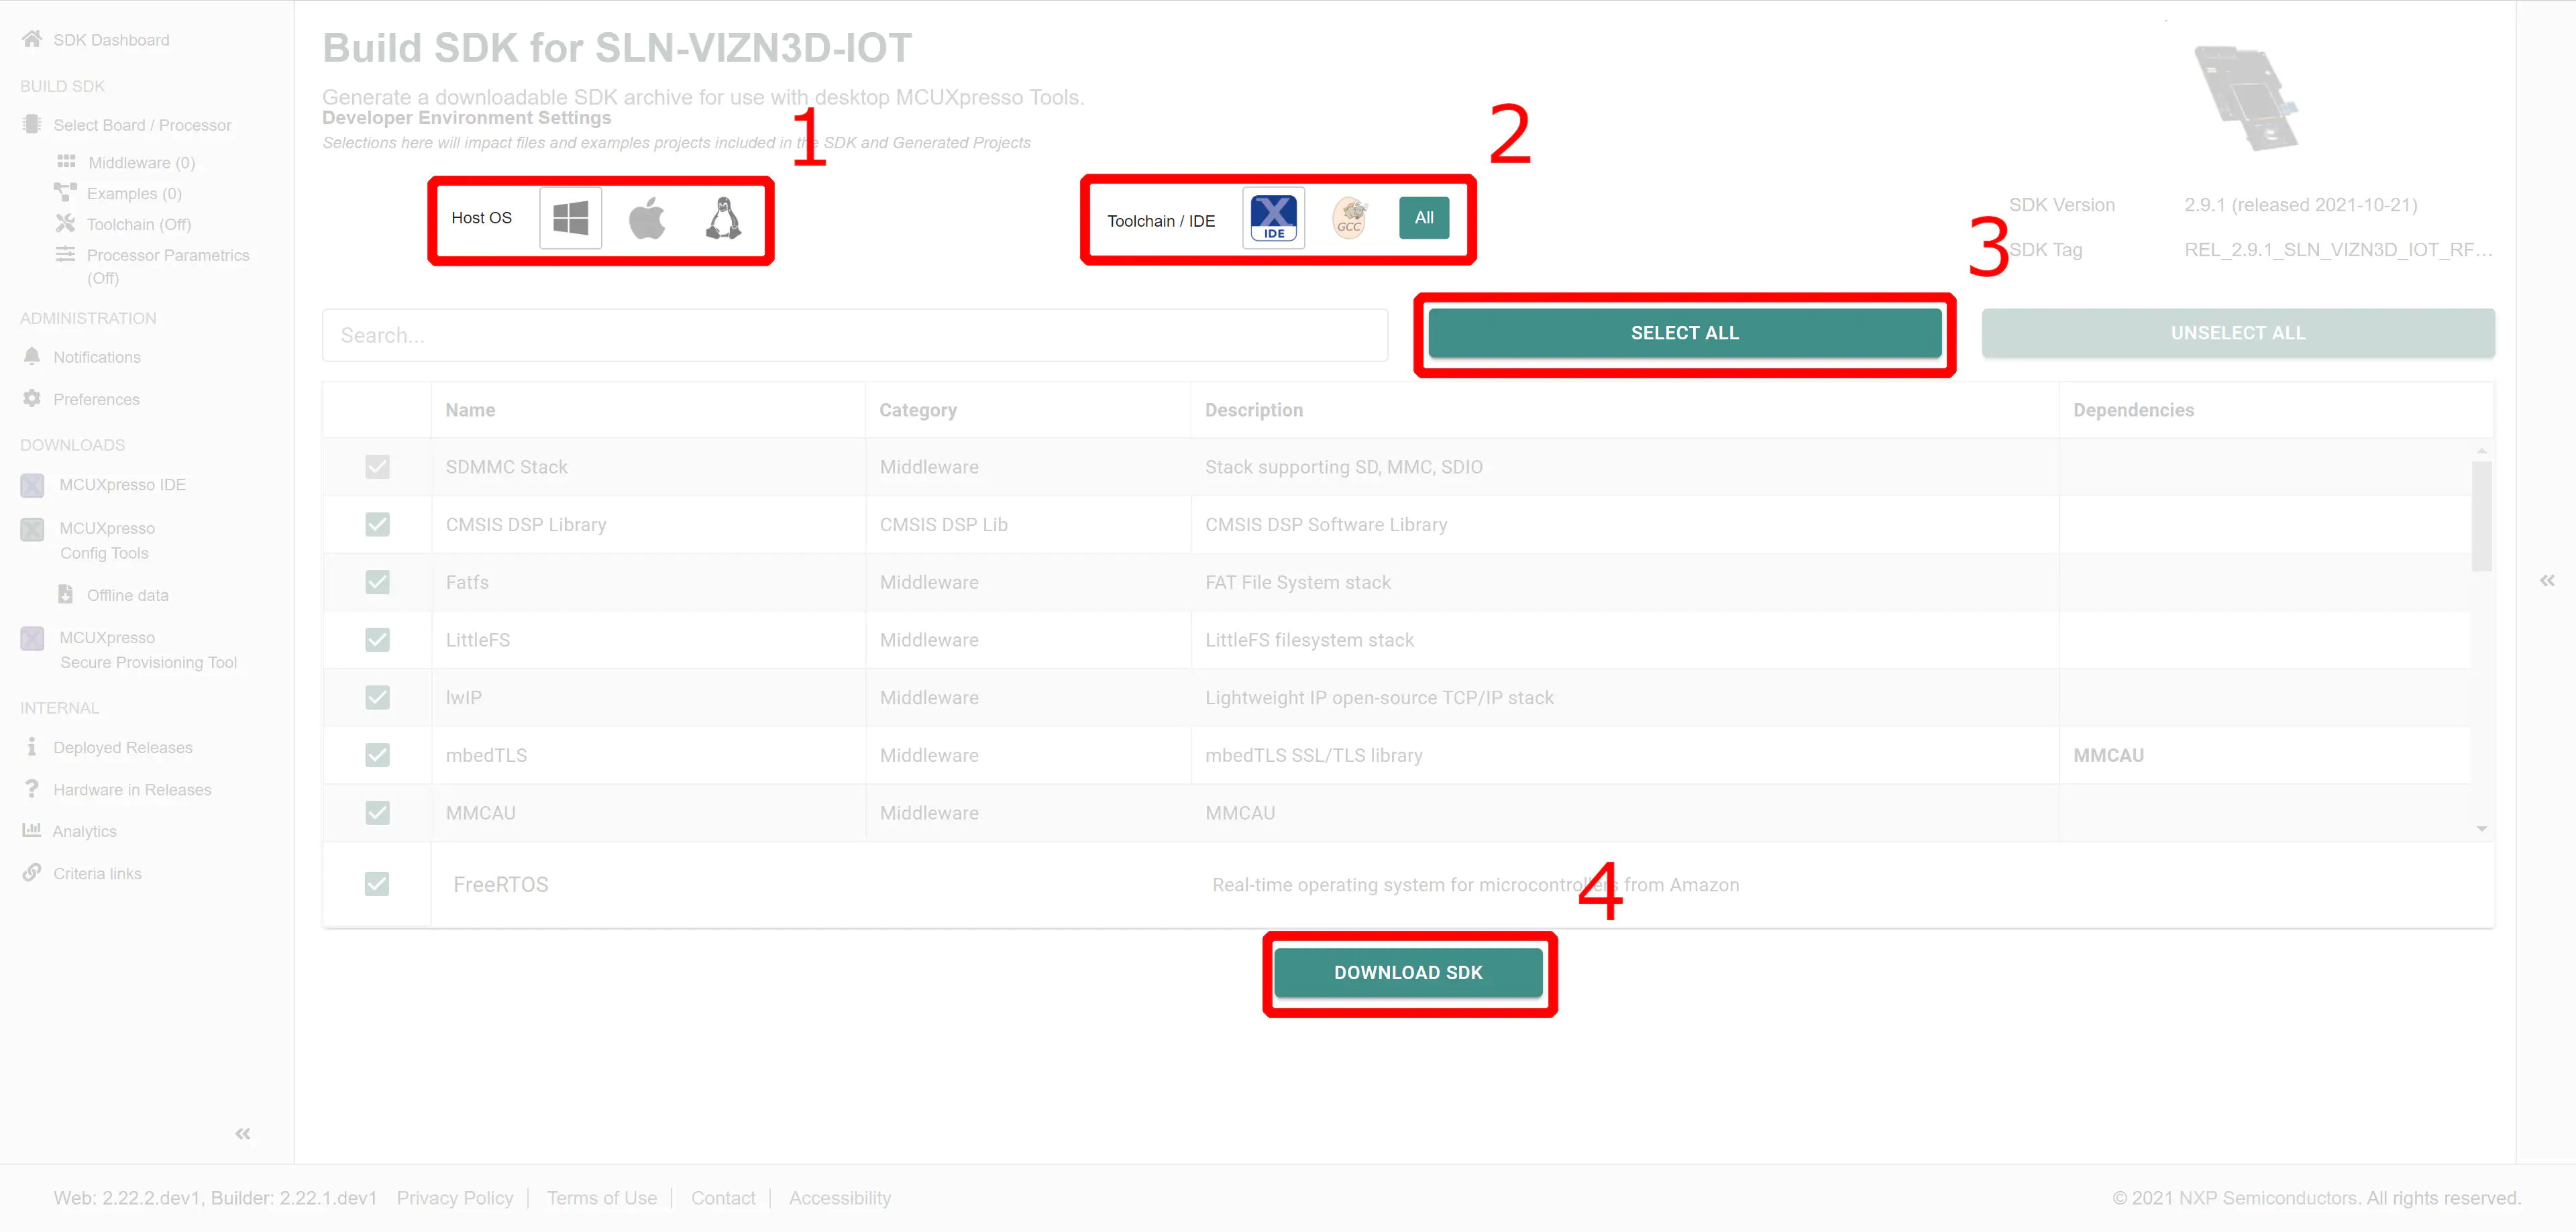
Install the SDK
In order to build projects using the MCUXpresso IDE, you must first install an SDK for the platform you intend to use. A compatible SDK has required dependencies and platform-specific drivers needed to compile projects.
A compatible SDK can be downloaded from the official NXP SDK builder.
To build the SDK for your preferred setup, perform the following steps:
- Select your preferred OS (Windows, Mac, Linux)
- Configure the SDK to be compatible your preferred toolchain (MCUXpresso IDE, ARMGCC)
- Use the Select All button to ensure that all necessary SDK components are included in the SDK package
- Click the Download SDK button
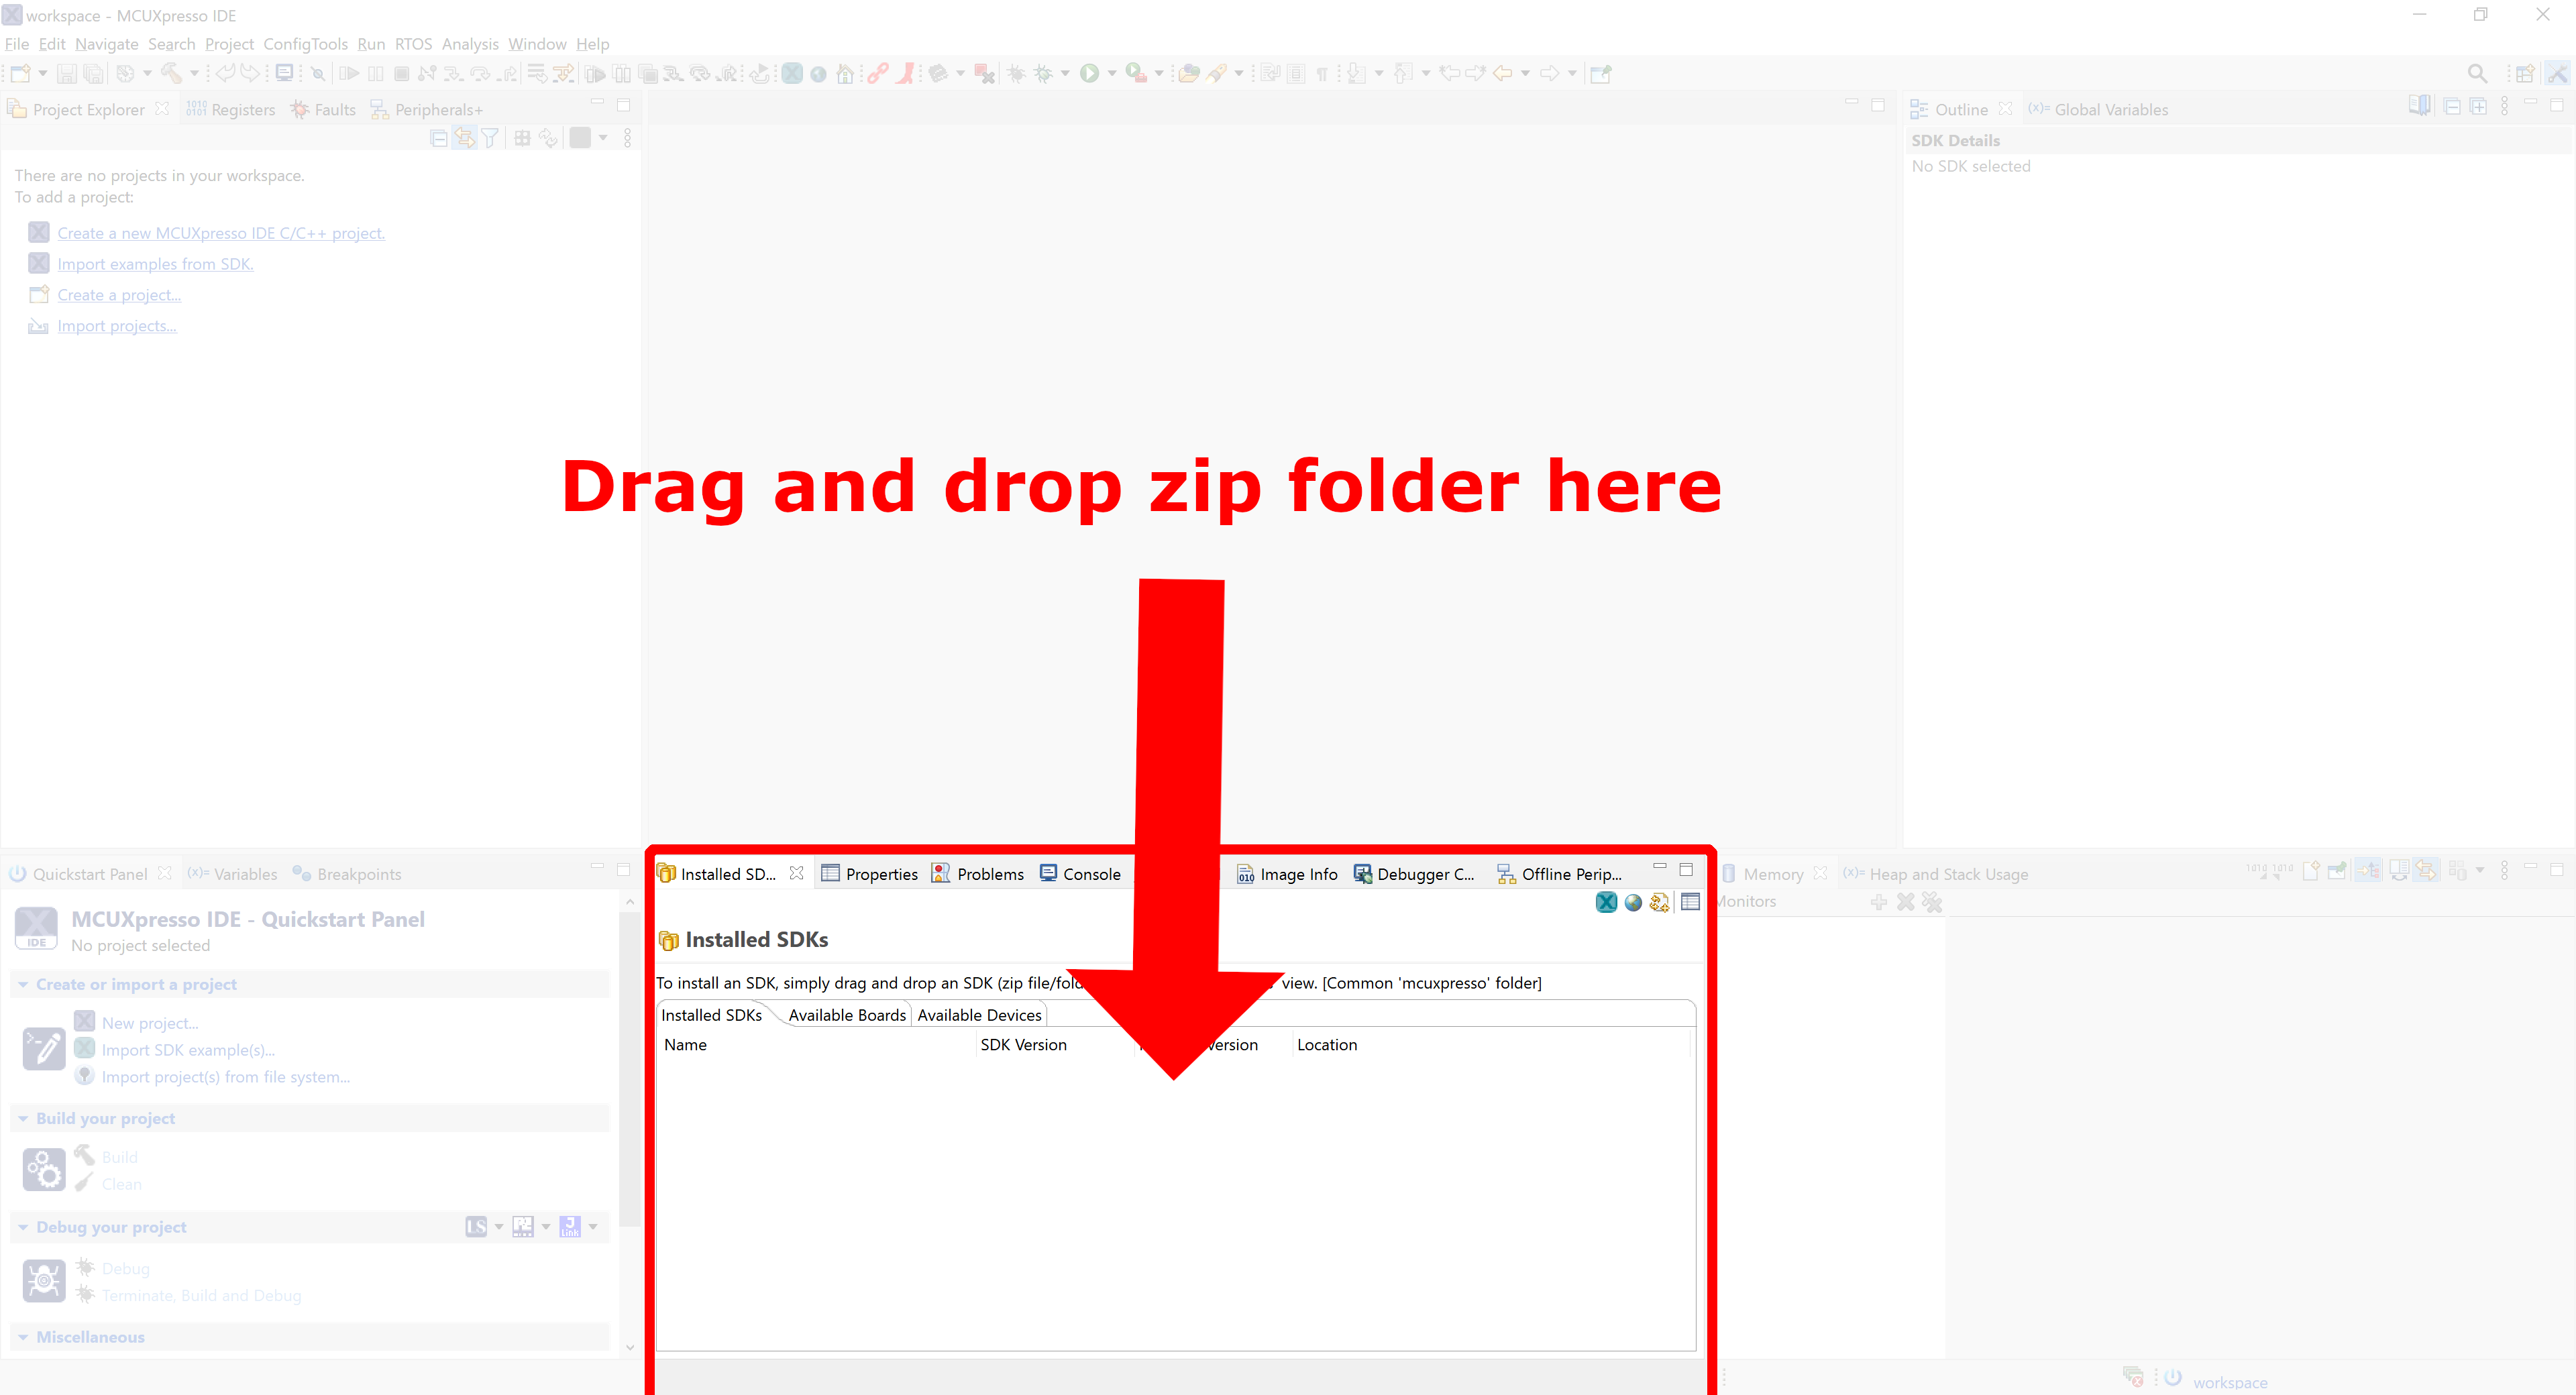
Once the SDK has been downloaded, it can be installed into MCUXpresso IDE by dragging and dropping the zip file into the Installed SDKs window in MCUXpresso IDE.
Import Example Projects
important
You must have a compatible MCUXpresso SDK package for the SLN-VIZ3D-IOT installed to build example projects you import regardless of how they are imported.
MCUXpresso IDE allows you to import example projects from a variety of sources including:
- A compatible MCUXpresso SDK package
- A zipped MCUXpresso project folder
- An unzipped MCUXpresso project folder
In this section we will discuss both methods officially supported for importing the Smart Lock application into MCUXpresso.
Import from Github (Option 1)
important
Before you begin, make sure you have Git downloaded and installed on the machine you intend to use.
The latest software updates for the SLN-VIZ3D-IOT Smart Lock application can be downloaded from our official Github repository. Here, you will find the most up-to-date version of the code which will contain the newest features available for the Smart Lock project.
To import the SLN-VIZ3D-IOT Smart Lock application into MCUXpresso IDE using Github, perform the following steps:
Clone the vizn3d_smart_lock repository.1
git clone https://github.com/NXP/vizn3d_smartlock_oobe.git
tip
1 Cloning directly to your MCUXpresso workspace location is recommended, but not required.
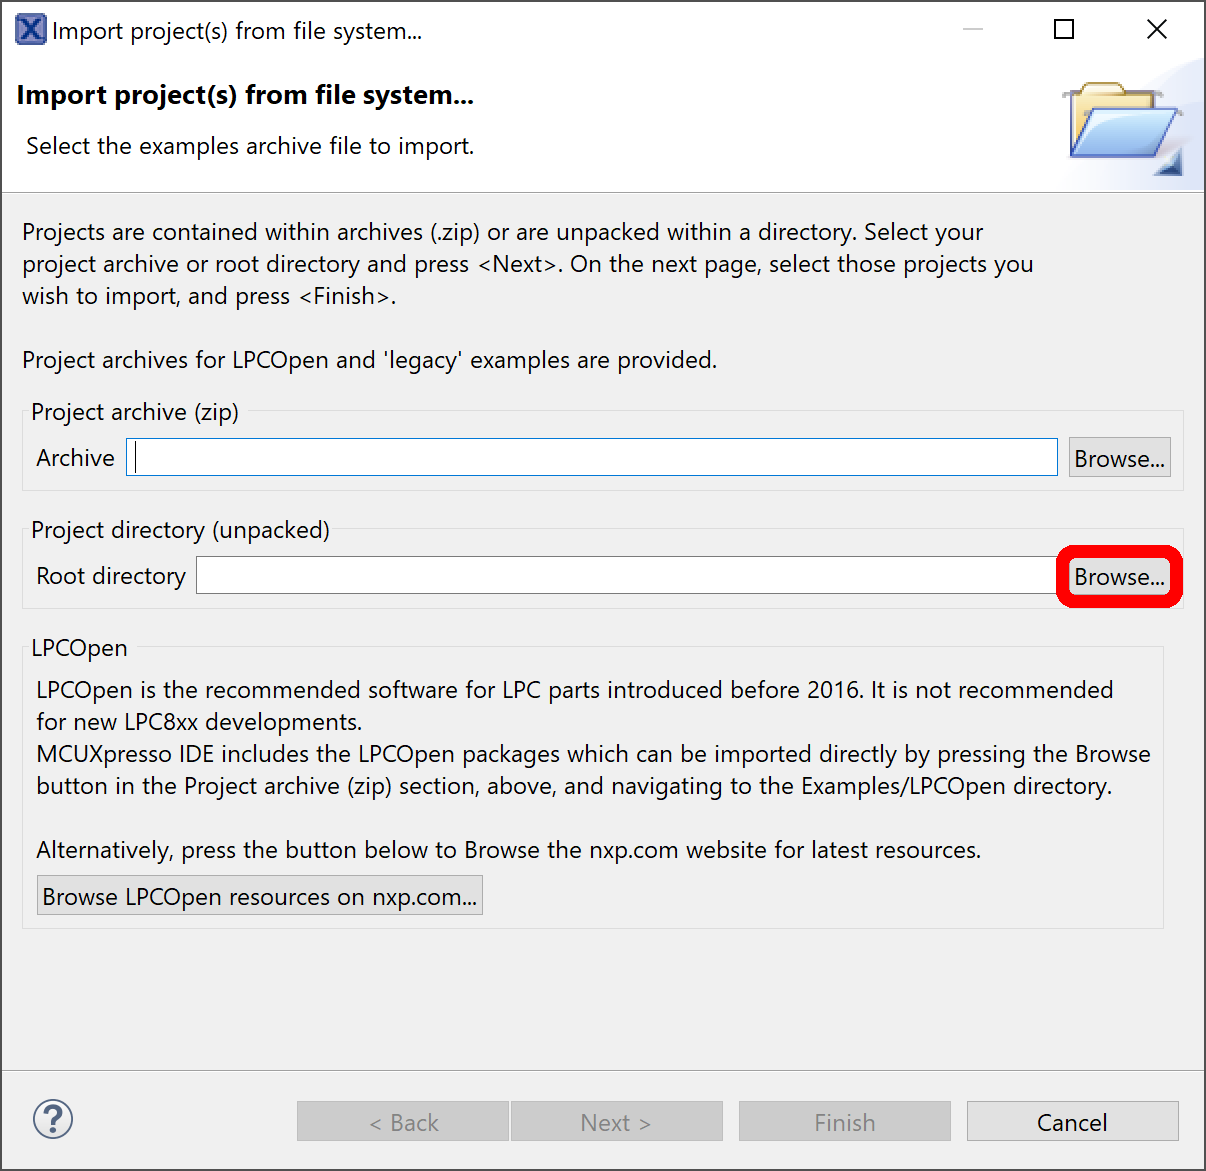
In MCUxpresso IDE, navigate to the QuickStart Panel and click Import Project(s) from File System...
Select Browse... next to the "Root Directory" box.
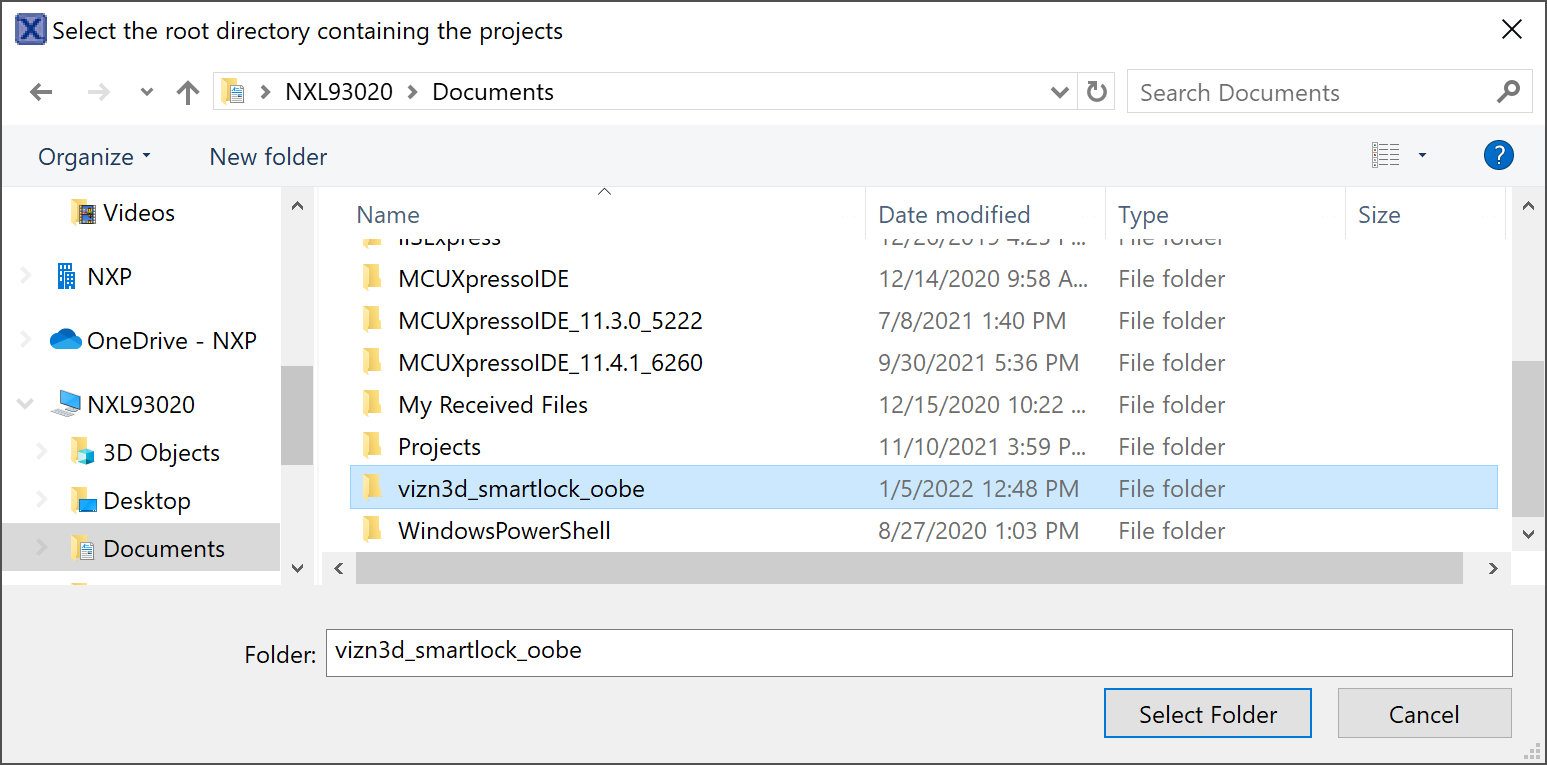
Navigate to the file path of the project cloned in the first step and click Select Folder.
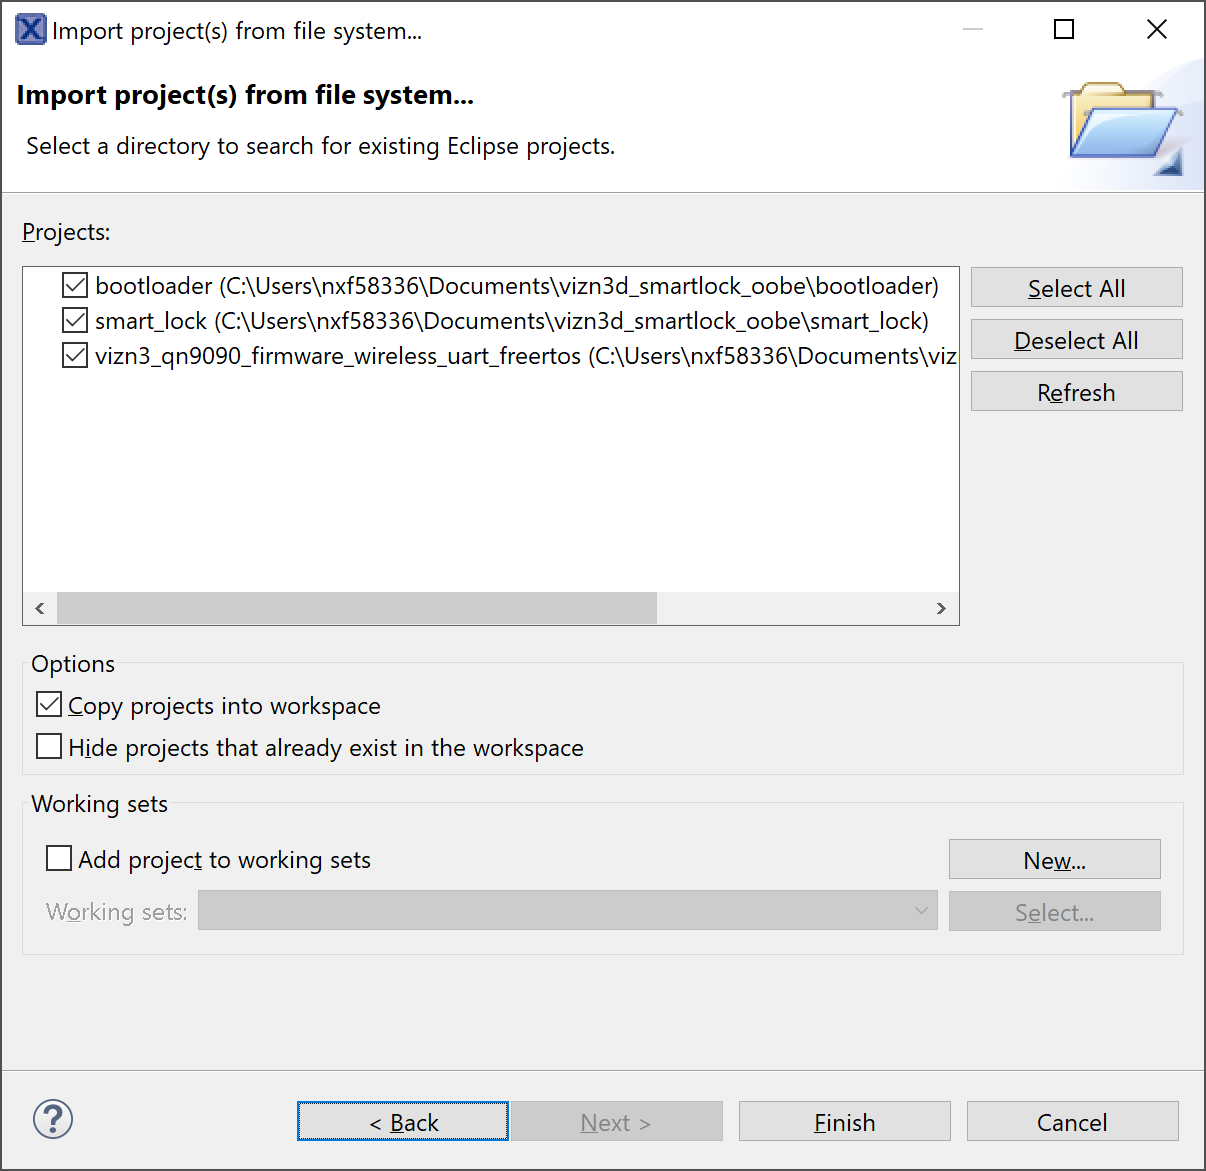
Click Next and check the box next to each project (sln_vizn3d_iot_smart_lock, and sln_vizn3d_iot_bootloader) you wish to import.
Click Finish after selecting the projects you want to import.
tip
It is recommended to import both projects if it is your first time doing so.
note
Deselect Copy projects into workspace if you want any changes you make in the original repo (git pull, etc.) to be reflected in MCUXpresso IDE.
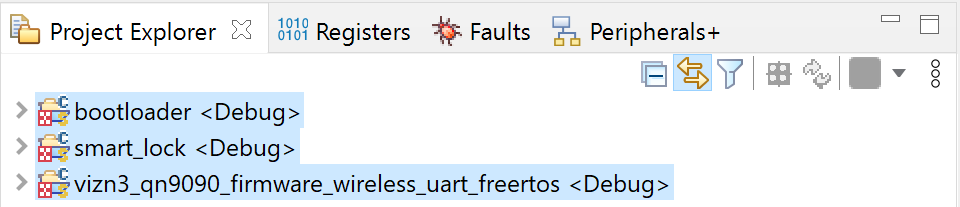
After following the above steps, confirm that the projects can be found in the Project Explorer.
Import from MCUXpresso SDK (Option 2)
important
For the latest version of our Smart Lock application, we recommend cloning the example project directly from our Github repository.
Instructions to import SDK examples using the MCUXpresso SDK can be found in the Getting Started Guide for the SLN-VIZN3D-IOT.